Check out the read aloud by Ms. Julia and see if you can create an ocean for your little boat to float on!
Our Lessons For the Week!
What is our theme? Ocean Foil Painting
What is the lesson (overall purpose)?
To reflect on the read aloud and talk about where your boat will go.
MA Guidelines/Standards:
APL 1: The child will demonstrate initiative, self-direction, and independence.
SEL7: The child will demonstrate the ability to communicate with others in a variety of ways.
SEL12: The child will demonstrate the ability to reflect on and evaluate the results of his/her actions and decisions.
APL 1: The child will demonstrate initiative, self-direction, and independence.
SEL10: The child will demonstrate the ability to seek help and offer help.
Learning Outcomes:
To recall the story and create art using different materials and media.
Songs, Books & Videos (Motivational Techniques)
If I Had a Little Boat read aloud by Ms. Julia (See Video Below)
Materials:
Activity (Procedure):
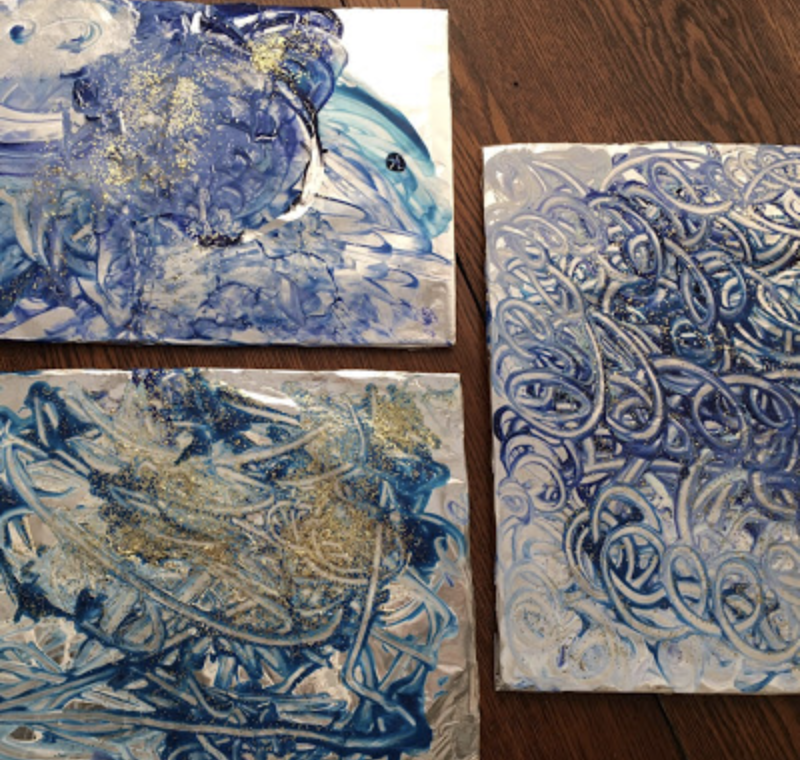
1) Wrap a piece of tinfoil around your piece of cardboard. Tape the tinfoil (on the back side of the cardboard) into place.
2) Squeeze paint onto the foil and have your child(ren) swirl the paint around with a q-tip. Once finished painting, shake glitter onto the paint at this point.
3) Once the paint is dried place ocean stickers onto your ocean scene.
4) Glue your boat to your ocean scene or place it on top so you can move it around your ocean.
Activity Wrap Up:
Lay project overnight to dry before adding stickers or gluing anything to it.
How do I know what my child is learning? (Assessment)
Ask open ended questions. Where will your boat sail too? What will it find when it gets there? What kind of animals live in the ocean?
How can you extend this activity? (Modifications)
You can use a paint brush or cotton balls.
Helpful Hints: (Pitfalls & Solutions)
If your child decided to use their hands to finger paint it the oils from their hands may cause the paint to peel off of the tinfoil.
Be careful not to rip the tin foil.
Our Lessons For the Week!
What is our theme? Ocean Foil Painting
What is the lesson (overall purpose)?
To reflect on the read aloud and talk about where your boat will go.
MA Guidelines/Standards:
APL 1: The child will demonstrate initiative, self-direction, and independence.
SEL7: The child will demonstrate the ability to communicate with others in a variety of ways.
SEL12: The child will demonstrate the ability to reflect on and evaluate the results of his/her actions and decisions.
APL 1: The child will demonstrate initiative, self-direction, and independence.
SEL10: The child will demonstrate the ability to seek help and offer help.
Learning Outcomes:
To recall the story and create art using different materials and media.
Songs, Books & Videos (Motivational Techniques)
If I Had a Little Boat read aloud by Ms. Julia (See Video Below)
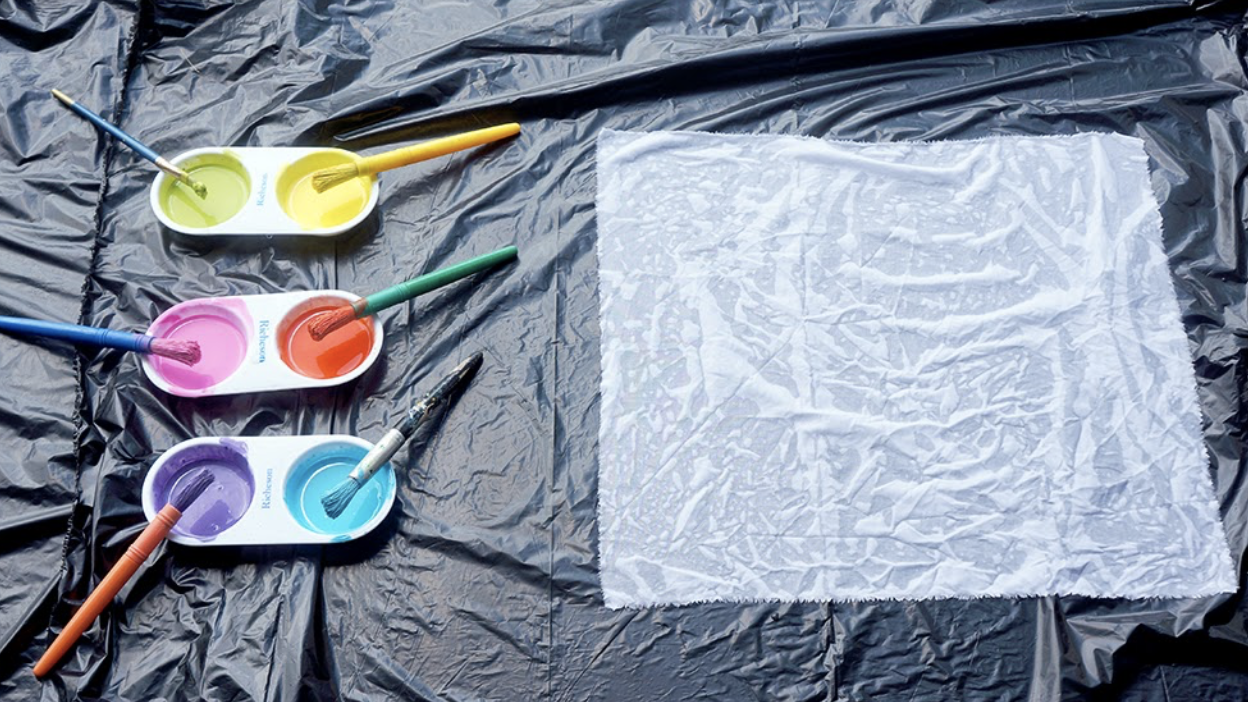
Materials:
- Cardboard
- Tinfoil
- Tape (I used packing tape, but I'm sure any kind would work)
- Paint (we used dark blue, light blue and white tempera paint)
- Q-tips
- Glitter (optional)
- Ocean Stickers (or print ocean clipart to glue on)
- Construction paper boat
Activity (Procedure):
1) Wrap a piece of tinfoil around your piece of cardboard. Tape the tinfoil (on the back side of the cardboard) into place.
2) Squeeze paint onto the foil and have your child(ren) swirl the paint around with a q-tip. Once finished painting, shake glitter onto the paint at this point.
3) Once the paint is dried place ocean stickers onto your ocean scene.
4) Glue your boat to your ocean scene or place it on top so you can move it around your ocean.
Activity Wrap Up:
Lay project overnight to dry before adding stickers or gluing anything to it.
How do I know what my child is learning? (Assessment)
Ask open ended questions. Where will your boat sail too? What will it find when it gets there? What kind of animals live in the ocean?
How can you extend this activity? (Modifications)
You can use a paint brush or cotton balls.
Helpful Hints: (Pitfalls & Solutions)
If your child decided to use their hands to finger paint it the oils from their hands may cause the paint to peel off of the tinfoil.
Be careful not to rip the tin foil.

 RSS Feed
