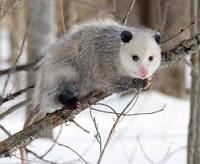
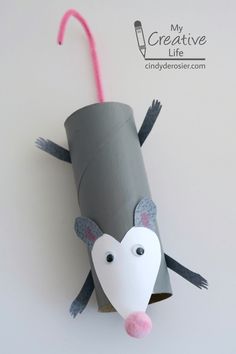
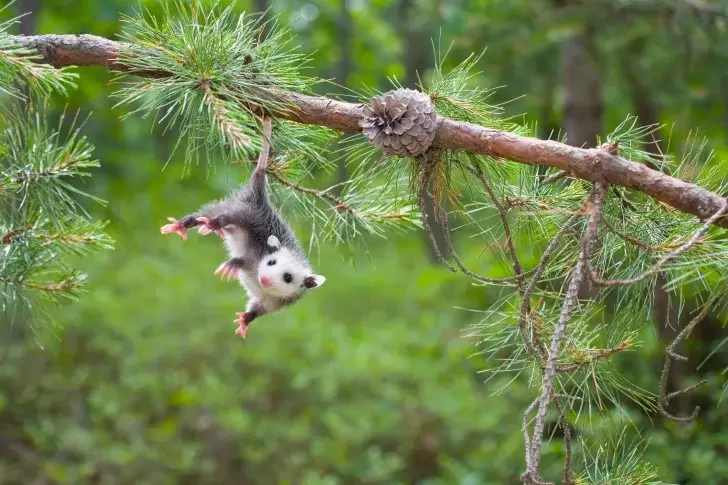
 Hi Friends… Let’s make an opossum using a toilet paper roll, paint or markers, paper and a pipe cleaner (or piece of string). What is our theme? opossums What is the lesson (overall purpose)? To learn about opossums. Opossums are generally nocturnal, foraging during the night. But it is not at all unusual to see an opossum out during the daytime, especially during cold weather. They also can be seen in the daytime when food is scarce or when they have been disturbed from their sleeping quarters. Opossums are good for eating unwanted pests around your home and garden such as snails, slugs, spiders, cockroaches, rats, mice and snakes. They are nocturnal omnivores and eat fruits, nuts, green plants, insects, snails, snakes, frogs, birds, and their eggs, as well as small mammals such as meadow voles, mice, and rats. Opossums do not prey on cats or other larger mammals but will attack them if cornered, or if competing for food. opossum and possum are not the same animal. Opossums are marsupials. They carry their newborns in a warm pouch. Then as they grow older, they will climb on the mothers back to ride, until they are able to be on their own. Opossums lay down and play dead when they are scared or stressed by their predators. They can stay there for hours, until they walk away. When it does this is get’s pretty stinky even smelling like it died. Opossums slow the spread of Lyme disease. They eat ticks. They will eat the ticks in your backyard. Opossums are immune to most snake venom. They like to eat snakes. They almost never get rabies because they have a low body temperature. Opossums are known to be one of the most sanitary animals in nature. They groom themselves a lot. They use their tongue and paws. This also helps cool them down when they are hot. Opossums do not like to live alone. MA Guidelines/Standard Visual Arts: Explore with a variety of materials to create 2 & 3 dimensional art work. Life sciences: life cycle of an opossum (babies in pouch, to back to adult). Projects that represent living animals (possum). Learning Outcomes: To learn about the opossum that lives on Cape Cod. Songs, Books & Videos (Motivational Techniques) The Possum song: https://youtu.be/MZc0f40mn00 Materials: toilet paper roll gray paint or marker glue or tape marker/crayons scissors pipe cleaner white paper (heart shape for head) Activity (Procedure): toilet paper roll opossum -paint or color the toilet paper roll gray -glue or tape the pipe cleaner to the end of the toilet paper roll. -cut a heart shape out of your paper -color the tips of the heart gray for the ears. -put eyes and a pompom nose on your heart (for its face). -then add the legs..4 of them -let dry Activity Wrap Up: Can you make your opossum move like a real opossum? Do you remember what opossum's eat? Where they sleep? How do I know what my child is learning? (Assessment) What facts do you remember about opossums? Do you think an opossum is a good animal to have in your backyard? yes/no, why or why not? How can you extend this activity? (Modifications) Opossums can hang by their tail for a short time. Can you hang from a jungle gym or climber? The mother Opossums carry their young babies on her back (after they are ready to leave her pouch). What can you carry on your back, without using your hands? How many can you balance on your back when walking around on your hands and knees? Helpful Hints: (Pitfalls & Solutions) If you are missing supplies, you can also use rocks or pine cones to make your opossums. Maybe cotton balls and dryer lint to make them fluffy. |
|
0 Comments
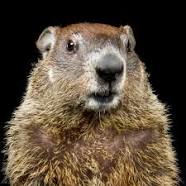
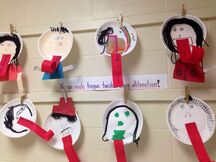 Hi Friends… Have you ever seen a woodchuck (or a groundhog) in your yard? Let’s learn some facts about woodchucks/groundhogs. For this activity, we will be working on saying some tongue twisters (a sentence of words that is hard to say quickly and correctly). What is our theme? Woodchucks/groundhogs What is the lesson (overall purpose)? To learn about woodchucks/groundhogs. *The groundhog, also known as a woodchuck, is a rodent, belonging to the group of large ground squirrels known as marmots. *Woodchucks live for about 3-6 years. MA Guidelines/Standards: Language & Literacy: talking and letter sounds. Learning Outcomes: To learn about woodchucks/groundhogs and be able to say (or try to say) a tongue twister. Songs, Books & Videos (Motivational Techniques) Fun Facts About Groundhogs: https://youtu.be/wfrq11bowOw The Woodchuck Song: https://youtu.be/b8nR9iROHDk 10 Easy Tongue Twisters: https://youtu.be/bVKYCNg9tak Materials: -Small paper plate (or you can trace a small plate on a piece of white paper and cut it out) -marker/crayons/pencil/scissors -glue -a long piece of red paper or any color you would like your tongue to be -yarn or strips of paper for hair -button or pom pom for eyes (or you can draw them) Activity (Procedure): -Watch the above videos Tongue Twister craft: -make your face on the paper plate (eyes, nose, mouth, ears, hair, etc.). -Then take your long long tongue and you are going to roll it around the pencil until it is all rolled up. -Then you are going to unravel your paper tongue and glue it onto your plate. Activity Wrap Up: Can you say any of the tongue twisters slow? How about fast? Do you know any other tongue twisters? Challenge other family members to say them. How do I know what my child is learning? (Assessment) Review what you learned about woodchucks/groundhogs. How can you extend this activity? (Modifications) Sing the alphabet song forwards and try singing it backwards. What other silly songs do you know? Helpful Hints: (Pitfalls & Solutions) If you don’t have the materials for this project. No worries. You can make your person using a stick and the dirt outside. Can you draw it? Then use a leaf or a strand of long grass for the tongue.
Hi Friends…
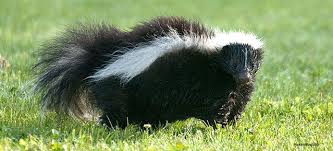
For this skunk activity, you will need index cards (or small pieces of paper like the size of a sticky note), scissors, markers or crayons. Have fun making the game Don’t Get Skunked. : ) What is our theme? Backyard Animals: Skunks What is the lesson (overall purpose)? Have you ever seen a skunk in your backyard? Have you ever smelled a skunk? Let’s learn some facts about skunks. Skunk Facts: *Skunks live in North & South America. They live both in the city and in the country. *Skunks are mammals. They have black fur with a thin white stripe from their snout to their forehead. They have a white marking from their neck down their backs. Their tail is black and bushy with white hairs. They have short ears and black eyes. *They eat both plants and meat. They eat fruit and plants, insects, birds eggs, mice and birds. *They are nocturnal animals: they typically sleep during the day and are awake at night. *A boy skunk is called a buck. A girl skunk is called a doe and a baby skunk is called a kit. *Skunks have glands around their bottom that spray their stinky smell. MA Guidelines/Standards: Language & Literacy: Alphabet writing & recognition, number writing, colors, shapes, etc. Math: number recognition Social & Emotional: taking turns during game play. Learning Outcomes: I hope that the children will know what a skunk looks like, eats and why it sprays. Songs, Books & Videos (Motivational Techniques) Skunk Sprays Inquisitive Bear: https://youtu.be/sJ1eLJFQ14c Book: Tanka Tanka Skunk: https://youtu.be/pKv3q1XysaA NATURE | Is That Skunk? | Baby Skunks | PBS: https://youtu.be/vEcTVa6YjcQ Materials: Index cards Markers/crayons scissors Activity (Procedure): Game: Don’t Get Skunked Making the game cards: *hold the index card horizontal *Fold the index card in half (so it is wide, not tall and narrow). Like you are making a book. *cut the index card on the crease line *on each index card you will write an alphabet letter (both the uppercase and lowercase letter on each card) ie. Aa Bb Cc Dd Ee, etc. *You can also do one color on each card (either writing the color word or just drawing a circle and filling it in with that color). *You can also write numbers 0-20 *Or words that you know how to spell (on each card) Flip the cards face down (in a pile). Then shuffle them (so that they are all mixed up). Ready to play the game: 2 people (or more) One person will draw a card and hold it up for you to see. Can you identify the card (is it a letter, number, color, etc)? If you are correct you hold on to it. If you are wrong it goes in a separate pile. Then it is the next person’s turn. At the end of the game: you count up to see who has the most cards in their pile. The person with the most cards is the Winner! :) Activity Wrap Up: What cards did you get “skunked” on? Just practice those ones more next time. How do I know what my child is learning? (Assessment) Talk about skunks. Do you ever see them in your yard? Have you ever seen them? Watch the 2 videos above (see links). Talk about what you saw in these videos. Are you afraid of skunks? Have you or anyone you know (pets also) ever been sprayed. What was that like for them? (Ms. Nancy has been sprayed before while running on a trail around a pond: Stinky! and oily-Yuck!). How can you extend this activity? (Modifications) Book: Tanka Tanka Skunk (see link above). Clap or drum out the beats (syllables) in your name, family members, etc. Helpful Hints: (Pitfalls & Solutions) If you are playing this game with older siblings, make their deck of cards harder (topics they want to learn or review). If players are younger, you can do picture cards of animals or objects in your house. 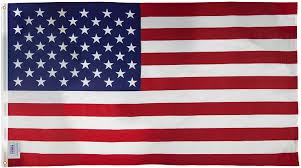 Hi Friends… We have no school today, because it is Memorial Day. In this activity, you will be learning what Memorial Day is all about. Let’s have a parade to celebrate the day. : ) What is our theme? Memorial Day What is the lesson (overall purpose)? What is Memorial Day? MA Guidelines/Standards: Music: sings expressively( uses soft and loud voice while singing). Plays instruments using different beats, tempos (parade: march). Movement & Dance: Expresses themselves through movement and dance (moves to music at their own pace and style). Visual Arts: Explores how color can convey mood and emotions. (how does red, white and blue make you feel?). Explore a variety of materials to create 2 and 3 dimensional artwork. (drums, flags, etc.). Use basic shapes to create artwork. Display artwork. Learning Outcomes: To learn about why Memorial Day. To decorate with red, white and blue. Songs, Books & Videos (Motivational Techniques) Book: Memorial Day Surprise: https://youtu.be/vJcKj4S7jZ8 Factual Information: History of Memorial Day For Kids: https://youtu.be/Acj9VIYa4Tk Poppy Craft: https://youtu.be/xsyNb65k73Y Patriotic Sing Along: https://youtu.be/vPKp29Luryc, You’re a Grand Old Flag:https://youtu.be/rFV_tmTcU0Q This Land Is Your Land: https://youtu.be/rRnHx3yVuf4 Materials:Have your own parade Bikes: decorate your bike *Red, white and blue streamers (or ribbon) *Paper or Cardboard Stars (scissors, old cereal boxes, different types of paper, etc.) *Markers, crayons, paint (red, white, blue) *Tape or string (yarn, twine, ribbon, etc.) Instruments: Make your own *plastic eggs *rice or sand *old pot/pan/plastic flower pot, oatmeal container, plastic containers, sandpaper blocks, etc. *wooden spoon American Flag (or make your own using strips of paper. red/white, then a section of blue and some stars). glue, a stick or paper towel roll. Markers, crayons or paint. A phone/tablet/portable computer Patriotic Hymn music Activity (Procedure): For this activity...you will be creating your own parade.
-Then color the strips of paper, red or white. Glue them onto your paper creating a pattern of red/white stripes. -At the top of your flag, glue a blue piece of paper (rectangle) and then make white stars using either a crayon or your finger dipped in white paint. -Let dry before attaching to a stick with a piece of tape or string. Activity Wrap Up: Staging the parade: (bring your materials where you will be having the parade) *Line up your bike(s) *Bring outside your instruments *Turn on the music *Attach the flag to your bike, or prop it up somewhere along the parade route (or have someone else carry it). You can also march in the parade to the rhythm of the music. How do I know what my child is learning? (Assessment) Talk about other holidays that they know about and that you celebrate as a family. Talk about traditions that you have as a family and how did those traditions come about and why they are important that they continue in your family. How can you extend this activity? (Modifications) Decorate your yard with flowers in remembrance of people/pets that you may have lost in your family. Visit a cemetery and place your flag on someone’s grave. (in remembrance of that person). Helpful Hints: (Pitfalls & Solutions) If you are unable to have your parade outside, you can also have your parade in the house. But, instead of riding your bike, you can just march in the parade with your instrument(s) that you made. Hi Friends…
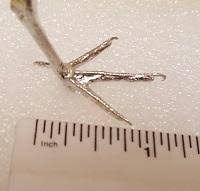
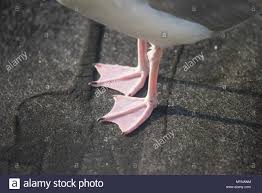
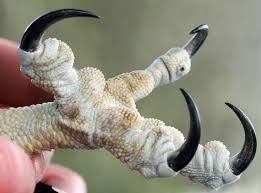
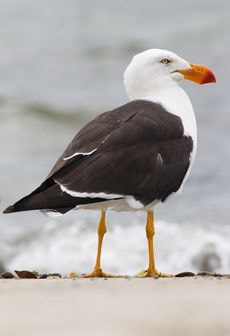
Do all birds have the same type of feet? Yesterday we talked about camouflage, today we will be talking about the feet on the birds that we have studied this week. Why do birds have the type of feet that they have? webbed vs. toes & talons. For this lesson, you will need different types of footwear (shoes, slippers, high heels, flippers, boots, sneakers, flip flops/sandals, etc.) What is the lesson (overall purpose)? To learn about functional feet of birds. Most seabirds have flexible webbed feet that help them be powerful swimmers or help propel them across the water to gain speed for takeoff. Some species have strong claws on their feet to help with fishing as well. MA Guidelines/Standards: Observe and describe how natural habitats provide for the basic needs of plants and animals with respect to shelter, food, water, air, and light. Link to Living Things and Their Environment 2.8 ■ visit locally accessible forests, ponds, seashores or nature museums to observe the characteristics that help birds and animals thrive in their natural habitat (e.g., claws for climbing and digging, fins or webbed feet for swimming; wings for flying, spines for protection). Build body awareness, strength, and coordination through locomotion activities. Link to Growth and Development 1.1, 1.2 Use both sides of the body to strengthen bilateral coordination. Link to Physical Activity and Fitness 2.1 Learning Outcomes: After looking at birds feet, you will be able to know why the bird has the feet that it does. Does it spend a lot of time swimming in the water? running on the water's edge, or fishing with its talons. Songs, Books & Videos (Motivational Techniques) The Foot Book: https://youtu.be/L1TvPIzyu_c What If You Had Animal Feet: https://youtu.be/LGcTHoBRu3E Materials: different types of footwear (flippers, slippers, snow boots, cowboy/girl boots, high heels, flip flops, sandals, etc. ) Activity (Procedure): Go outside (with a basket of different types of footwear) Preferably be on the grass or someplace soft. Take 1 pair of footwear at a time, put them on your feet. Then with each pair of footwear, Carefully try to: *jump 3x (hold someone's hand for balance) *3 giant steps forward & then backwards *walk on your tippy toes *balance on 1 foot *walk on the heels of your feet Try this through wet sand/dirt, grass, etc. Which pair of foot wear is the easiest to walk in with which shoes? Activity Wrap Up: What footwear was it the easiest to perform the different movements in? How do I know what my child is learning? (Assessment) Talk about different types of animals ...and their feet that they have. Why do you think they have the feet that they do? How can you extend this activity? (Modifications) Trace your feet using a pencil or crayon on a piece of paper. Then trace the feet of other members of your family. Do you have the same feet? What is different? What is the same? Go outside: See if you can find any animal foot prints (or shoe prints). This is a lot of fun to do in wet sand at the beach. Observe outside or through the window: animals that are in your neighborhood. What kind of feet do they have. Even if you have family pets, look at their feet (gently). Do they have nails or sharp claws? Do they have pads on their feet? Are the bottom of their feet soft? Where do they walk or run? Helpful Hints: (Pitfalls & Solutions) If you don’t have lots of footwear at home, you can always make some using tissue boxes, cereal boxes, etc. Hi Friends…
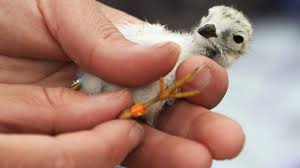
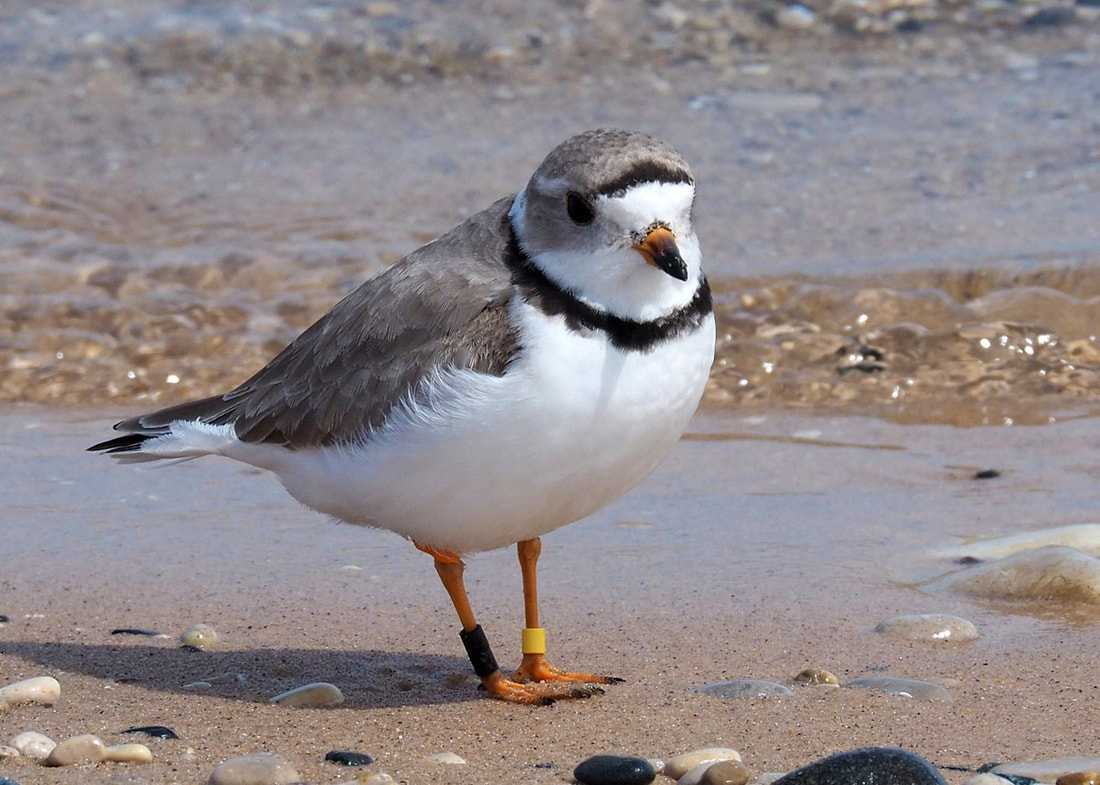
Do you know what a piping plover is? Have you ever noticed at the beach, areas of sand fenced off to protect the piping plovers? In this lesson, we are going to learn about piping plovers, what it means to be camouflaged, conservation and what it means to be endangered. For today’s activity, you will be playing Hide & Go Seek with your family. You are going to see if you can camouflage yourself, so it is a bit harder to find you (either in the house or in your yard). What is the lesson (overall purpose)? To learn about respecting animals and their habitats on Cape Cod and to learn about why the piping plover is protected on Cape Cod. Endangered species are animals and plants that are in danger of becoming extinct. The Northern Great Plains and Atlantic coast piping plovers are threatened species. Threatened species are animals and plants that are likely to become endangered in the future. Identifying, protecting, and restoring endangered and threatened species is the primary objective of the U.S. Fish and Wildlife Service's endangered species program. What is the Piping Plover? Appearance - These small shorebirds have a sand-colored upper body, a white underside, and orange legs. During the breeding season, adults have a black forehead, a black breast band, and an orange bill. Habitat - Piping plovers use wide, flat, open, sandy beaches with very little grass. Their nest is on the beach, typically. Reproduction - The female lays four eggs in its small, shallow nest lined with pebbles or broken shells. Both parents care for the eggs and chicks. When the chicks hatch, they are able to run about and feed themselves within hours. Feeding Habits - The plovers eat insects, spiders, and crustaceans MA Guidelines/Standards: Compare and contrast natural materials such as water, rocks, soil, and living organisms using descriptive language. Link to Earth’s Materials 1.1 ■ look for living organisms (eg insects, plants, animals) in their natural environment. Observe and identify the characteristics and needs of living things: humans, animals, and plants. Link to Characteristics of Living Things 2.1 observe living creatures in their natural environment (e.g., ants, spiders, insects, worms, snails, birds) to learn about their habits. ■ describe or represent first-hand observations about the characteristics, behavior, and growth of plants and animals (e.g., what happens when a plant dries out? How do fish/animals eat, move, behave, and grow? What detailed characteristic of a flowering plant do they observe?). Learning Outcomes: I would like you to learn what a piping plover looks like, why they are endangered and how you can help keep them safe at the beach in the summer on Cape Cod. Songs, Books & Videos (Motivational Techniques) Peep: the story of the Piping Plover (NY): https://youtu.be/uC_zqKlfKug Piping Plover on Plymouth (MA) Beach: https://youtu.be/1zgUDrXvVvk Book: Piping Plover Summer https://youtu.be/zjacpe9ybiQ Materials: *A sibling, parent or family member. Activity (Procedure): Listen and watch Piping Plover Summer (see link above). Either go outside or stay inside. Game: Camouflage Hide & Go Seek *Notice what color your clothes are. You will be looking to hide next to objects, materials, furniture, trees, etc. of that color. One person will count from 0-20 and then will go on the hunt looking for the person (people) that is hiding. Take turns hiding & counting. Game: #2 Camouflage Hide & Go Seek with nature Sit quietly outside or by a window looking outside. Observe and see what animals you see. (ie. birds, squirrels, insects, etc.). Why is it hard to see them? Why is it easy to see them? Activity Wrap Up: Where were some of the places that you hid. Was it easy for them to find you in that hiding spot? Why or why not? Was it easy for you to find the other person when it was your turn to count? Why or why not? How do I know what my child is learning? (Assessment) Talk about why the piping plover is protected. Do they know any other animals that are either extinct or that are endangered? Next time you are at the beach, look to see if that beach has an area where the piping plover is protected. Read the information signs that are on the fence. Observe (with your eye) to see if you see any piping plovers. Are they easy to see or are they camouflaged? Why do they blend in with their habitat so easily? Do you think piping plovers should be protected? Why? How can you extend this activity? (Modifications) Song: Camouflage (tune: Jingle Bells) Camouflage, Camouflage colors, spots or stripes. Helps protect the animals all different types. Camouflage, Camouflage Helps them night or day. Hide away from predators so they won’t be prey. Hey! Camouflage, Camouflage better watch your back Predators will use it too then they can attack! *Cape Cod National Seashore: Become a National Park Service Junior Ranger (explore, learn and protect). Helpful Hints: (Pitfalls & Solutions) If your beach doesn’t have an area for the piping plovers, take a trip to another beach to see if they have an area. Hi Friends,
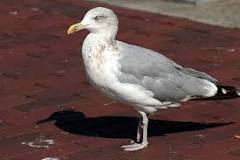
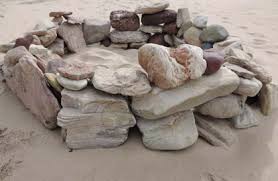
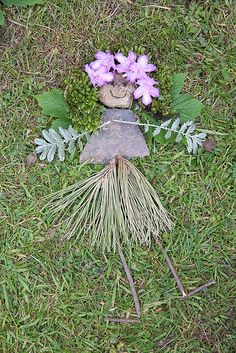
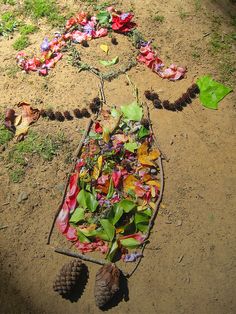
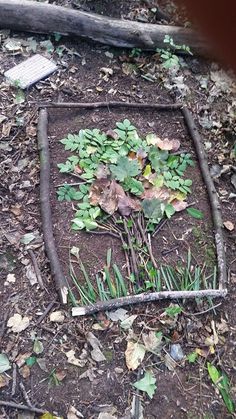
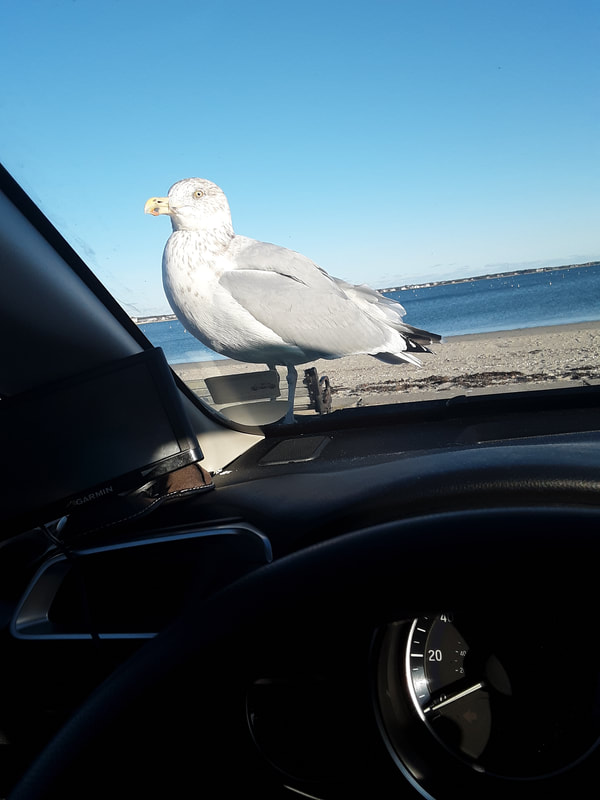
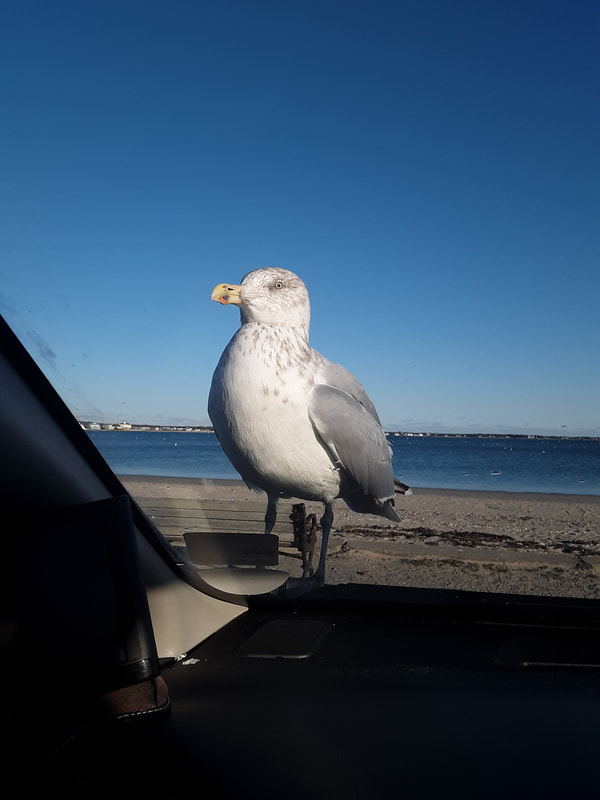
Today, we are going to talk about Herring “gulls”. We are going to use loose materials from nature to create our own pictures. We will also be talking about water pollution and how it endangers animals. What is the lesson (overall purpose)? To learn about animals that live on Cape Cod. MA Guidelines/Standards: Language: Observe and use appropriate ways of interacting in a group (taking turns in talking; listening to peers; waiting until someone is finished; asking questions and waiting for an answer. Participate actively in discussions, listen to the ideas of others, and ask and answer relevant questions. 1-2 Vocabulary: Engage in play experiences that involve naming and sorting common words into various classifications using general and specific language. Earth Science: Compare and contrast natural materials such as water, rocks, soil, and living organisms using descriptive language. Learning Outcomes: To learn about (seagulls) gulls and also how you can help your family keep your neighborhood clean and healthy so that animals will be safe. Fun Facts about Herring Gulls: What do they look like: Adult herring gulls have slightly hooked bills marked with a red spot, gray backs, black wingtips, and white heads and under parts. In the winter, their heads have dark streaks. Young gulls, known as juveniles, are speckled brown. The legs of herring gulls, at any age, are pale pink. Food & Water: Herring gulls are omnivores. They like to eat both plants and meat. Some of the foods that they like to eat are: fish, insects, eggs, crabs, mussels, sea urchins, small clams, zooplankton, trash, etc. Herring gulls drink both freshwater and saltwater. Life Span: Herring Gulls live for about 20 years in the wild. Nests: Herring gulls build their nests close to rocks, logs or bushes to protect it from predators. They typically will make their nests in soft soil or sand or short grass. The female will lay 3 eggs at a time. Herring gulls are active all year on Cape Cod. At one time they used to migrate during the winter. But, once people started feeding them, they have learned to eat from dumpsters and other man made places to get food throughout the year. The word seagull is actually an informal way of referring to any of the species that are gulls. ... the most familiar of our gulls is the large herring gull - the one most likely to steal your chips at the beach! Songs, Books & Videos (Motivational Techniques) Book (snippet): Oscar The Herring Gull (part of the book) https://youtu.be/Qk1QODJvUKc A whale’s Tale: https://youtu.be/xFPoIU5iiYQ Water Pollution: https://youtu.be/Om42Lppkd9w Materials: loose pieces from nature (rocks, twigs, leaves, etc.) Activity (Procedure): Take a walk in nature (your backyard, beach, woods, etc.). Gather different loose materials that you could use at your house (ie. acorns, pine-cones, feathers, twigs, leaves, driftwood, etc.). What does a gull look like? (look at a picture of the Herring Gull). What shape is their body? wings? head? legs? Create your own gull using loose pieces from nature. Activity Wrap Up: What did you make your gull out of? What shapes did you make (triangle, semi circle, rectangle, unique shapes, etc.). What else can you make using your loose pieces? Can you create a picture of yourself? Making Comparisons: Is your head the same size as a herring gull? Do you have wings or are they arms? Do your legs look the same? Do you have feathers? Do gulls have skin? etc. How do I know what my child is learning? (Assessment) After reading the snippet of Oscar The Herring Gull. Talk about why gulls shouldn’t eat paper and plastic. Watch: Whale Tale & Water Pollution videos (links above) Why do you think gulls and other animals might eat plastic and paper? How can you keep plastic and paper off of the beach? Do you recycle at home? How can you extend this activity? (Modifications) Neighborhood Clean Up (beach/hike): Bring a trash bag and a pair of rubber gloves with you. Pick up any trash that you see. Helping your family: Can you help to keep your house clean? How can you help your family at home or in the yard? Helpful Hints: (Pitfalls & Solutions) If you can’t get outside...Can you create a gull using recycled materials? Hi Friends…
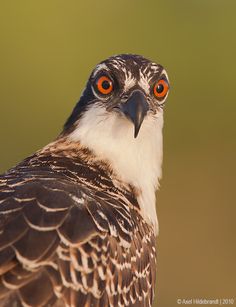
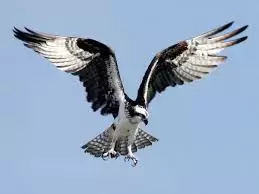
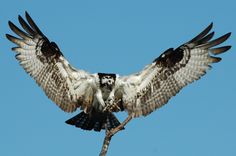
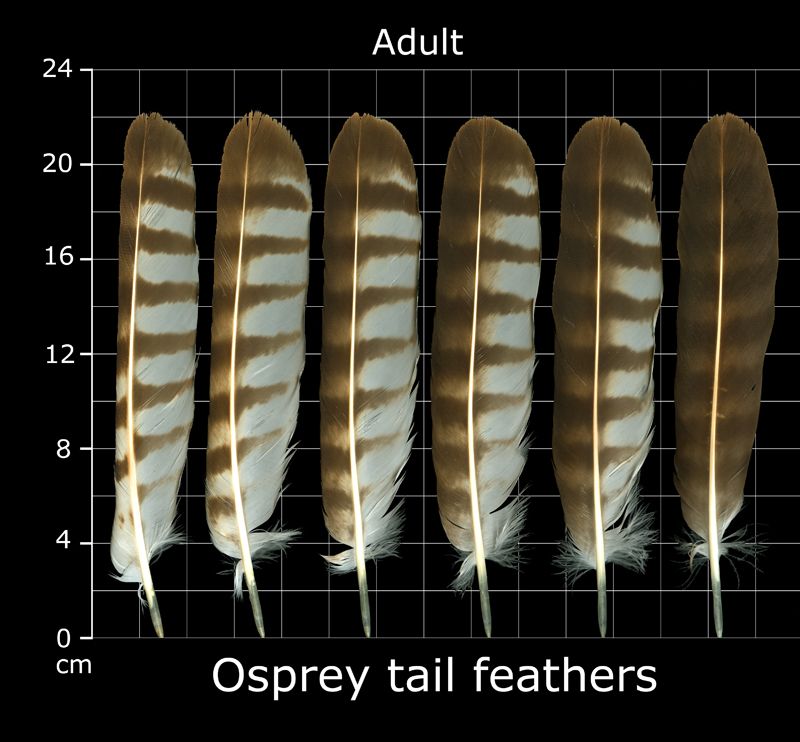
When we were in school, we briefly talked about ospreys for the letter O page in our Cape Cod Alphabet Books. Let’s review what we learned and see what else we can learn about these cool birds that live on Cape Cod. For today’s project we are going to explore the pattern of the osprey tail feather. What is our theme? Osprey (patterns on tail feather) What is the lesson (overall purpose)? Let’s learn about osprey’s. I hope that your child will be able to identify an osprey/osprey nest if they see one near the water. MA Guidelines/Standards: Recognize, describe, reproduce, extend, create, and compare repeating patterns of concrete materials. Link to K.P.3 Use positional language and ordinal numbers (first, second, third) in everyday activities. Link to K.N.3 Learning Outcomes: What and where can you find osprey’s? Osprey Facts: The osprey is a large hawk. White undersides and a crook in its narrow wings identify this bird as it soars above the water. Adults are dark brown above with brownish-black marks on the wings and brown speckling on the breast. The head is white with a dark brown crown and brown streak down the cheek. The female is typically larger than the male. At 18 months, osprey achieve their full adult plumage. Juvenile osprey resemble the adults, but have buff-tipped feathers on the back of their upper body, giving them a speckled appearance, and the streaking on the breast tends to be heavier. As juvenile osprey mature, their eye color changes from brown to yellow. Ospreys build large nests from sticks. The nests sit atop telephone poles, docks or trees. Ospreys lay between one and five eggs at one time. The eggs don’t hatch all at once though. The first egg hatches a few days before the last. Ospreys mate for life. Their first nest is small, but they add to it every year. After a few years, the nest can be big enough for a human to sit in. Osprey migrate during the winter months on Cape Cod. Osprey’s were almost extinct, as they were being poisoned by chemicals (1940-1970’s). Their population is increasing. Ospreys are now protected under the Migratory Bird Treaty Act (MBTA). It is illegal to hunt or kill them. Osprey’s can live up to 20 years in nature. Osprey’s can also be called “river hawks” or sea hawks”. Osprey’s can be found on every continent except Antarctica. Songs, Books & Videos (Motivational Techniques) Osprey’s return to Cape Cod: https://youtu.be/H0rsJ8kRQfQ Osprey Chicks: https://youtu.be/yGPxT98vGjI Book: Pattern Fish: https://youtu.be/7_mqVCewsYA Materials: *Paper (brown paper bag or light colored piece of paper ..not white). *scissors *crayons (black/white) *picture of osprey tail feather (see picture above) Activity (Procedure): *Creating your own Osprey tail feather.
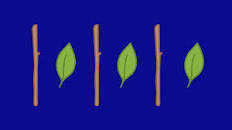
2. On a piece of paper you are going to create your own osprey tail feather. Long oval shape. Then you will make horizontal stripes, alternating colors (black/white or 2 other colors). 3. When finished you can cut it out using a pair of scissors. Activity Wrap Up: Can you think of any other animals that have patterns? (ie. zebra). Why do you think animals have patterns/designs on them? How do I know what my child is learning? (Assessment) Ask your child what they recall about osprey’s. (what does an osprey look like? Where do they live? What does it mean to migrate? Where do they build their nests? How can you extend this activity? (Modifications) Take a walk outside: look for patterns in nature (leaves, rings on the inside of a tree trunk, seashells, etc.). Can you create a pattern using natural materials? (IE. leaf, twig, leaf, twig, etc.) Helpful Hints: (Pitfalls & Solutions) If you can’t get outside...look for objects that have patterns in the house (IE. comb, tile on floor/back-splash, clothing, zippers, etc.). Can you create a pattern using your toys, crayons, etc? More information about osprey: U.S. Fish & Wildlife Service |
AuthorMs. Nancy - Pre-Kindergarten Teacher Archives
June 2020
Categories |
 RSS Feed
