WELCOME THE LAUREL SCHOOL TODDLER, PRESCHOOL & PRE-KINDERGARTEN VIRTUAL CLASSROOMS
  • Welcome
  • Toddler
    • Ms. Naomi & Ms. Haley
    • Ms. Margo & Ms. Tonia
  • Preschool
    • Ms. Rachel
    • Ms. Julia
    • Ms. Taisha
    • Ms. Amanda
    • You Tube Stories & Songs
  • Pre-Kindergarten
    • Ms. Lynn
    • Ms. Nancy
  • Ms. Sunny's Corner
  • Student & Family Shares!
  • Contact

ms. Lynn
​Pre-kindergarten

Here are some resource for families to access at home!

playdough clouds

4/30/2020

0 Comments

 
What is our theme? The weather

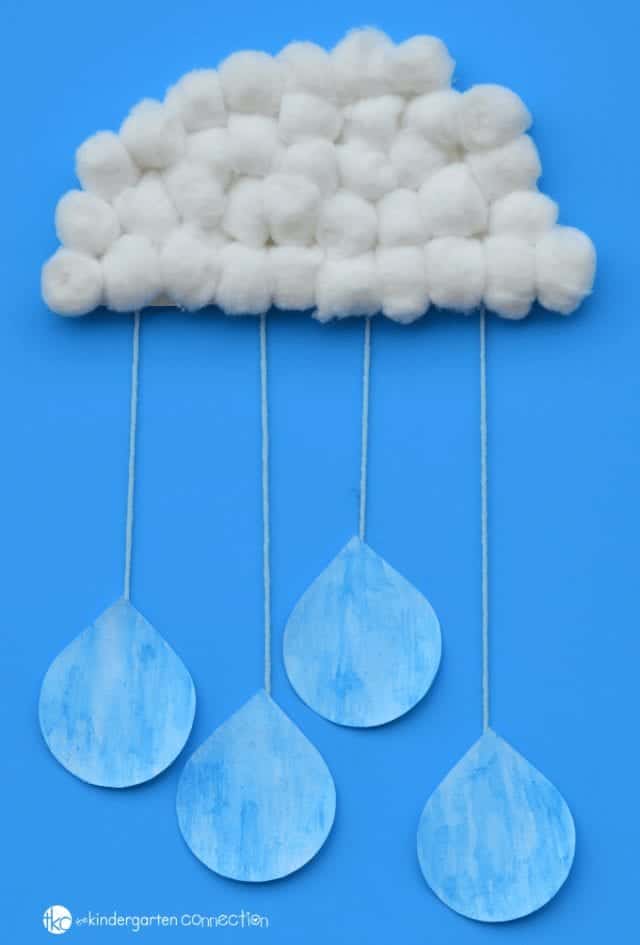
What is the lesson (overall purpose)? The children will measure ingredients and build fine motor skills playing with playdough and create white clouds with the playdough. 

MA Guidelines/Standards: Math skills, following directions,
Pre- writing skills.

Learning Outcomes: The children made their own playdough.

Songs, Books & Videos (Motivational Techniques): See attachment below


Materials: 2 c corn starch
                 1 ¼ c unscented white hand lotion
                 2-3 drops of peppermint extract
                  Measuring cup 
                  Bowl
                  large spoon


Activity (Procedure):1. Put ingredients in a large bowl
                               2. AS you stir the mixture it will form into a ball
                               3. Sprinkle a flat surface with cornstarch 
                             4. Knead the dough until it is firm
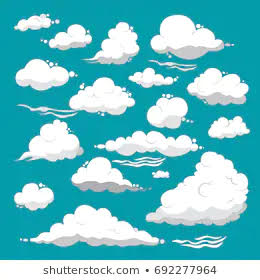
                             5. Make clouds with your homemade playdough 


Activity Wrap Up: the children are having fun playing with their homemade playdough 

How do I know what my child is learning? (Assessment): Talk about clouds and what part of the water cycle  they pertain to. ( condensation ). Are their different kinds of clouds? 


How can you extend this activity? (Modifications): add food coloring to make a different color playdough

Helpful Hints: (Pitfalls & Solutions): If your playdough is mushy keep kneading it until it gets firm


​
Picture
0 Comments

rainbow colors

4/29/2020

0 Comments

 
What is our theme? The weather


What is the lesson (overall purpose)? To learn the colors of the rainbow ( red, orange, yellow, green, blue, indigo, violet ) 


MA Guidelines/Standards: Prek ps1 Investigate natural and human-made objects to describe a rainbow.


Learning Outcomes: The children will learn that there are 7 colors that make up a rainbow and know what they are.

Songs, Books & Videos (Motivational Techniques)see attachment below


Materials: colored paper  red,orange,yellow,green,blue,indigo,violet 
                  Colored markers, scissors, glue

Activity (Procedure)1. Cut the 7 colors of paper into inch squares ( 30 pieces ) 
                               2. On a large piece of white paper, starting at the top draw with a red marker an arch 
                               3. Under the red arch make an orange arch about an inch down from the red one.
                               4. Do the same with the yellow,green,blue. Indigo, and violet markers
                              5. Glue the red squares on the red arch ( do the same with the orange,yellow,green blue,indigo,violet ) 


Activity Wrap Up: Your child just made a beautiful rainbow using colored paper squares


How do I know what my child is learning? (Assessment): Can your child name the 7 colors in a rainbow


How can you extend this activity? (Modifications): Add a sun and raindrops to your picture ( the 2 weather aspects needed to make a rainbow )


Helpful Hints: (Pitfalls & Solutions): If you don’t have indigo use light blue and dark blue paper


​
0 Comments

EVAPORATION: rain

4/28/2020

0 Comments

 
What is our theme? The weather


What is the lesson (overall purpose)? Teaching Why does it rain  ( the water cycle ) through a science experiment. 
EVAPORATION

MA Guidelines/Standards:
Pre k ps 1-3 Differentiate between properties of an object and those of the material of which it is made ( evaporation )


Learning Outcomes: The children will understand that water evaporates and collects in the sky (condensation ) till it has to let it go because it’s so heavy (precipitation Or rain )


Songs, Books & Videos (Motivational Techniques)See attachment below: 
Water Cycle Lesson 4/28/2020

Materials:
 A small jar  ( have to be able to see though it ), Permanent marker, Water


Activity (Procedure):
1. Fill a jar with water 

2. With the permanent marker draw a line ( even with the water line ) on to the jar. 
3. Put the jar in front of a window 
4. Observe the water the water in the jar for a few weeks
5. Where did that water go?
6. Did you see the water leave?
                                 

Activity Wrap Up: Talk about evaporation. Did you see the water leave? Where do you think it went? When a puddle dries up where does it go? Evaporation! ( ponds, lakes, the ocean )


How do I know what my child is learning? ( assessment ) your child now understands that you can’t see evaporation but you know it is happening. 


How can you extend this activity? (Modifications) Fill water in different size jars  ( the water disappears )


Helpful Hints: (Pitfalls & Solutions) make sure the jar is placed in a warm space. 


​
0 Comments

Making a rain mobile

4/27/2020

0 Comments

 
What is our theme? The weather  


What is the lesson (overall purpose)? What does precipitation look like? Making a rain mobile


MA Guidelines/Standards: pk.2 Use a combination of dictating and drawing to supply information about a topic


Learning Outcomes: Your child is creating their own rain storm 


Songs, Books & Videos (Motivational Techniques): See attachment below


Materials: coat hanger, blue and white paper, string ,scissors, cotton balls


Activity (Procedure): 1. Cut out raindrops from the blue paper
                                2.tie strings to the coat hanger ( A string for each raindrop you made )
                                3 Glue raindrops to the end of the string  
                                4.cut out clouds from the white paper and glue cotton balls on the clouds  
                                5.glue clouds to the top of the coat hanger


Activity Wrap Up: Your child just made a beautiful rainstorm mobile


How do I know what my child is learning? (Assessment): Talk about the water cycle ( Evaporation, condensation, precipitation ) The mobile shows precipitation.


How can you extend this activity? (Modifications):  Your child can add lightning bolts to the mobile


Helpful Hints: (Pitfalls & Solutions): When the mobile is finished hang it over a door frame so the children can watch the raindrops move when you walk by.


​
Picture
0 Comments

making a caterpillar!

4/24/2020

0 Comments

 
What is our theme? Insects


What is the lesson (overall purpose)? To reinforce the process of metamorphosis by making your own caterpillar.


MA Guidelines/Standards: Pre k ls1 Compare using descriptions and drawings to create your own caterpillar.

Learning Outcomes: The children will create their own beautiful caterpillar and know that this is the second stage of metamorphosis of a butterfly. 

Songs, Books & Videos (Motivational Techniques) See below


Materials: Egg carton, paint, pipe cleaners, googly eyes


Activity (Procedure): 1. Cut an egg carton down the middle 
                                                2. Paint the egg carton green
                                                3. On one end add the antennae (they actually use them to smell!!! )
                                                4.Add the googly eyes   


Activity Wrap Up: Take your caterpillar with you to have breakfast, lunch and dinner! Have your caterpillar pretend to eat your food! Remember all they do is eat eat eat!!

How do I know what my child is learning? (Assessment) Talk about the 4 stages of metamorphosis 1, egg 2, caterpillar 3. Chrysalis 4. butterfly 

How can you extend this activity? (Modifications): If you have colored tissue paper you could use glue and cover the egg carton with pieces of tissue paper. 

Helpful Hints: (Pitfalls & Solutions) If you don’t have googly eyes you could cut small circles out of white paper and add the pupils


​
Picture
0 Comments

Insect camouflage

4/23/2020

0 Comments

 
What is our theme? Insects


What is the lesson (overall purpose)?  To learn that Insects use camouflage to protect themselves from danger.  


MA Guidelines/Standards: LS1-2 Recognize that all plants and animals change over time.


Learning Outcomes: The children will make a stick bug and learn that stick bugs look like trees and blend in to protect themselves from predators. 


Songs, Books & Videos (Motivational Techniques) See attachment below


Materials: 1 foot stick, pipe cleaners, googly eyes 


Activity (Procedure):
1. Go outside and find a stick that you  would like to turn into a stick bug

2. Take a pipe cleaner and starting from the middle wrap the pipe cleaner twice around the end of the stick.
3. Do the same thing to the other end of the stick and the middle of the stick
4. Bend the 6 pipe cleaners to make legs for the stick bug.
5. Add googly eyes to one end of the stick to make the insects head.
6. Take your stick bug outside and place it on a tree and see how it blends in with the tree. 


Activity Wrap Up: Talk about what it means to camouflage.

How do I know what my child is learning? (Assessment) Have your child find objects that will camouflage in front of a green leaf, a flower, the dirt, etc.

How can you extend this activity? (Modifications) Find objects around the house and try to find places where they could be camouflaged. 

Helpful Hints: (Pitfalls & Solutions) If you don’t have pipe cleaners you could use wire


​
Picture
0 Comments

metamorphosis

4/22/2020

0 Comments

 
Today the children are going to pretend they are an egg, caterpillar, chrysalis, butterfly

Purpose: To learn the process metamorphosis

Theme: Insects

Learning standard: Act out the stages of a butterfly first discussing metamorphosis

Motivational techniques:  See below

Procedure: 1 Using your imagination   you are an egg ( curl up into a small ball )
                   2. Using your imagination you are now a caterpillar   ( crawl around and eat eat eat!) 
                        Put snacks all over the floor and eat them!!
                   3. You are now a chrysalis get in your sleeping bag and take a nap
                   4 when you come out of the sleeping bag you are now a butterfly!!!!!  With beautiful 
                       Wings ( flapping your arms fly around the house )

Materials: Snacks for the caterpillar to eat, sleeping bag

Wrap up: What were you thinking about when you were in the sleeping bag. 

Assessment: The children have learned the stages of a butterfly ( egg, caterpillar, chrysalis,
                       Butterfly )

Modifications: If you would rather draw the stages on paper that is fine too

Helpful Hints: If you don’t have a sleeping bag you may use a blanket.

​
0 Comments

butterfly wings!

4/21/2020

0 Comments

 
Purpose : To create a beautiful butterfly and learn that their wings are asymmetrical.  

Theme: Insects

Learning standards: With prompting and support describe important details about what 
                                  Something looks like that is asymmetrical 

Learning outcomes: I would like the children to create their own butterfly and learn that the
                                 Wings are mirror images of each other.

Procedure: 1 fold a large piece of paper in half
                   2 On one side of the paper drop small blobs of paint
                   3. Fold the paper and smoosh the paint all around
                   4, OPEN and you have a beautiful asymmetrical picture
                    5 when dry fold on the center again and cut starting on the fold a heart shape
                     6 open and you have butterfly wings!!!  
                     

Materials: paper. Paint scissors 

Wrap up: Talk about asymmetrical

Assessment: The child has learned what asymmetrical means

Modifications: Instead of paint you can use ketchup, mustard, etc.

Helpful Hints: When folding the paper make sure it is in half!!

​
0 Comments

Pollination!

4/19/2020

0 Comments

 
This lesson is learning about pollination and the project is creating a flower garden with bees pollinating the flowers!

Lesson:
Pollination 


Purpose: To learn that bees are one of the most important animals on earth.. We need them so plants can grow.

Theme: Insects

Learning standard: compare using descriptions and drawings to explain  pollination

Learning outcomes: I would like the children to create their own beautiful garden and learn that bees fly from flower to flower spreading pollen so plants can grow new plants

Motivational techniques:  see attachment below
                                                                    
Procedure: 1. On a large piece of paper draw a garden..
                  2 Then add the bees ( your fingerprints )
                  3. Dip your finger in yellow paint and place anywhere in the garden      
                  4.add 6 legs to the bees!!

Materials: Paper, markers, crayons, paint

Wrap up: Your child just made a beautiful garden scene with bees flying all around.

Assessment: When finished the garden your child can add a sun, rainbow, themselves to the picture

Modifications: Have your child draw a vegetable garden. ( what is their favorite vegetable )
                       Instead of drawing flowers make them with crinkled tissue paper

Helpful Hints: If your running out of paper cut open grocery bags

​
0 Comments

Bees live in a hive...

4/17/2020

0 Comments


Lesson: Bees live in a hive

Purpose: Like ants bees have a queen ( larger than the other bees ). They work together to take care of the hive.

Lesson: Make a hive using the shape hexagon.
             Add the queen and the worker ants to the hive you created.


Learning standard: Compare using descriptions and drawings to explain what a beehive looks like.

Learning outcomes: I would like the children to learn that beehives and ant colonies are similar. ( they both have a queen and the others work together like a family to keep their home clean and safe ) 

Motivational techniques:  Look at the picture of a beehive below

Procedure:1. Make a hexagon out of a piece of cardboard.( 3 inch diameter ) Cut it out
                  2. On a piece of paper trace hexagons close together to create a hive
                 3.  Then with your finger prints add the bees ( Thumb for the queen and a finger for the worker bees.) Add 6 small legs and 2 antennas to your bees. You can use yellow paint, food coloring, mustard for the bees.

Materials: cardboard, paper, yellow paint, markers or crayons, scissors   

Wrap up: Your child made the inside of a beehive using the shape hexagon

Assessment: You can make a larger hive by using a bigger hexagon and  a large piece of paper

Modifications; Cut out large hexagons and place them together with tape on your living room floor to create a beehive in your house. Pretend you are the queen and put toys, snacks, dolls into the hexagons.

Helpful Hints: If you don’t have cardboard you can use a cereal box


​
Picture
0 Comments
<<Previous

    Author

    Ms. Lynn - Pre-Kindergarten Teacher

    Archives

    June 2020
    May 2020
    April 2020
    March 2020

    Categories

    All

    RSS Feed

Powered by Create your own unique website with customizable templates.