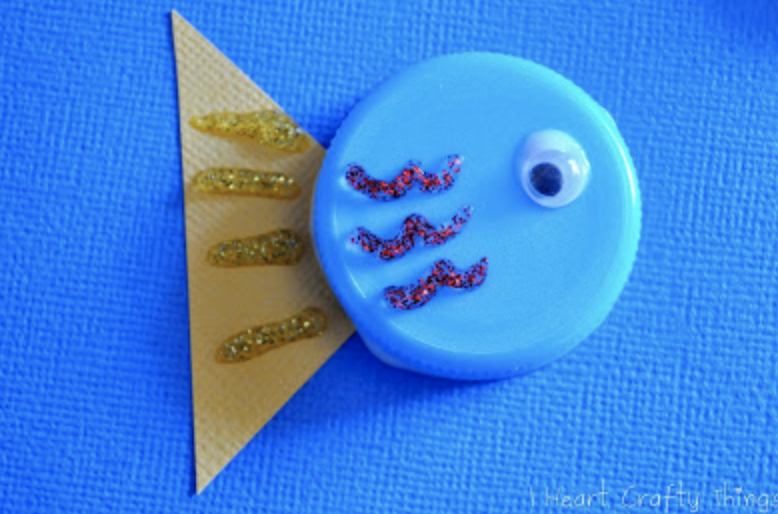
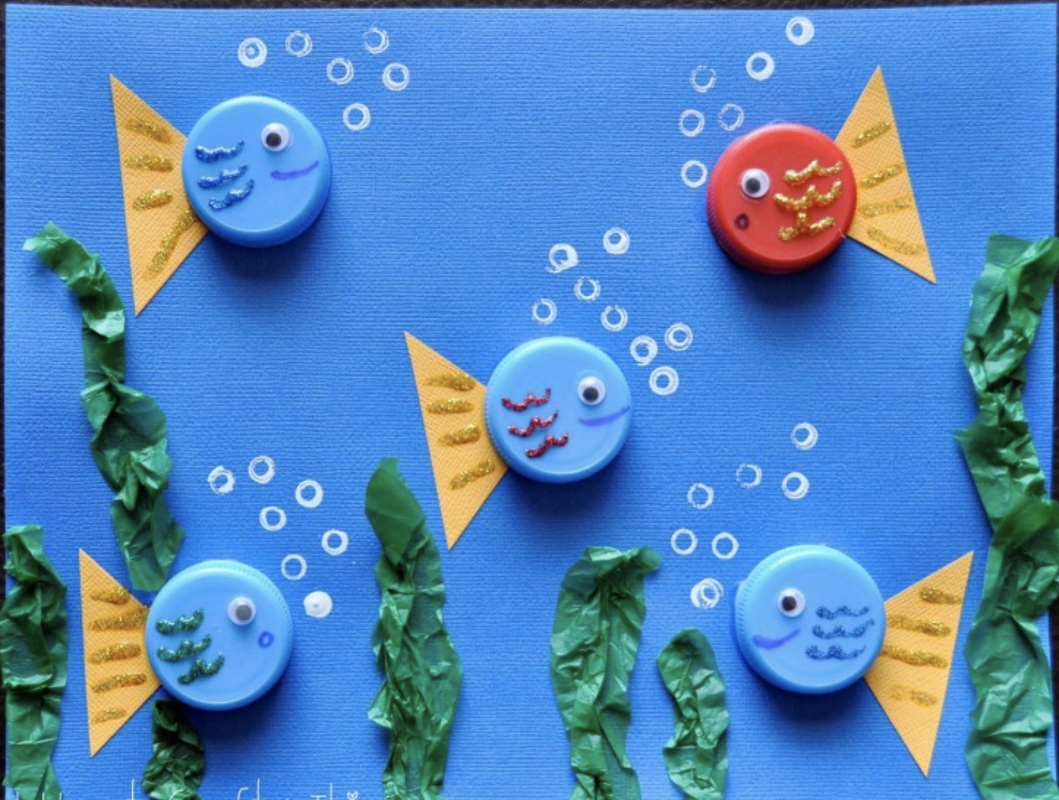
Lets try using those milk jug caps to make some fun fish!
Our Lessons For the Week!
What is our theme? Bottle Cap Fish
What is the lesson (overall purpose)?
Finding ways to repurpose materials instead of just throwing them away.
MA Guidelines/Standards:
APL 1: The child will demonstrate initiative, self-direction, and independence.
SEL7: The child will demonstrate the ability to communicate with others in a variety of ways.
Learning Outcomes:
This craft is great to teach children about shapes as well as about recycling.
Songs, Books & Videos (Motivational Techniques)
https://youtu.be/Ya_Yya021V8 - Summer Wonders read aloud by Ms. Julia
Materials:
1. To make the fish you need a milk cap and a triangle shape cut from paper. Start by gluing the triangle down on a blue sheet of paper. Squeeze some school glue onto one of your paper plates. Dip your bottle cap into the glue to give it a generous amount all around the rim and then glue the milk cap down overlapping the triangle to make the fish shape.
2. Continue adding fish all over your paper. Finish them by gluing on a googly eye.
3. To make the scales on your fish you can use glitter glue or markers. Make scales on the bottle cap and also lines to define the tail fin.
4. Use a black marker to draw a mouth on your fish. It probably would have been easier for the kids to draw the mouth on before using the glitter glue (just a heads up) that way they don’t accidentally smear glitter glue on their fingers or all over their fish.
5. To make the bubbles, dip the end of a paper straw in white paint and then press it onto your paper. The key to getting this to work properly is to make sure the white paint doesn’t bubble over the hole at the end of the straw. Every time we dipped the straw in the paint we had to turn it up and blow into the straw to pop the bubble if there was one. If you don’t blow the bubble out, you will just get a solid circle.
6. Now you can stop right here and enjoy your fishy scene, but if you want to add more detail to your scene you can crunch up little strips of green tissue paper and glue them to the bottom of your paper to make water plants.
Activity Wrap Up:
Lay your artwork on a flat surface to dry.
How do I know what my child is learning? (Assessment)
Ask open ended questions. Ask them to describe their picture to you. Explain how they made it and what shapes and colors they used.
How can you extend this activity? (Modifications)
What else can you find in the ocean? Can you create those creatures as well for your picture?
Helpful Hints: (Pitfalls & Solutions)
Make sure you give it enough time to dry.
Our Lessons For the Week!
What is our theme? Bottle Cap Fish
What is the lesson (overall purpose)?
Finding ways to repurpose materials instead of just throwing them away.
MA Guidelines/Standards:
APL 1: The child will demonstrate initiative, self-direction, and independence.
SEL7: The child will demonstrate the ability to communicate with others in a variety of ways.
Learning Outcomes:
This craft is great to teach children about shapes as well as about recycling.
Songs, Books & Videos (Motivational Techniques)
https://youtu.be/Ya_Yya021V8 - Summer Wonders read aloud by Ms. Julia
Materials:
- blue paper
- Milk jug caps
- colored paper(for the fish tails)
- Google eyes (or you can draw eyes)
- black marker
- green tissue paper
- glitter glue
- white paint
- paper straw
- 2 small small paper plates
- school glue
1. To make the fish you need a milk cap and a triangle shape cut from paper. Start by gluing the triangle down on a blue sheet of paper. Squeeze some school glue onto one of your paper plates. Dip your bottle cap into the glue to give it a generous amount all around the rim and then glue the milk cap down overlapping the triangle to make the fish shape.
2. Continue adding fish all over your paper. Finish them by gluing on a googly eye.
3. To make the scales on your fish you can use glitter glue or markers. Make scales on the bottle cap and also lines to define the tail fin.
4. Use a black marker to draw a mouth on your fish. It probably would have been easier for the kids to draw the mouth on before using the glitter glue (just a heads up) that way they don’t accidentally smear glitter glue on their fingers or all over their fish.
5. To make the bubbles, dip the end of a paper straw in white paint and then press it onto your paper. The key to getting this to work properly is to make sure the white paint doesn’t bubble over the hole at the end of the straw. Every time we dipped the straw in the paint we had to turn it up and blow into the straw to pop the bubble if there was one. If you don’t blow the bubble out, you will just get a solid circle.
6. Now you can stop right here and enjoy your fishy scene, but if you want to add more detail to your scene you can crunch up little strips of green tissue paper and glue them to the bottom of your paper to make water plants.
Activity Wrap Up:
Lay your artwork on a flat surface to dry.
How do I know what my child is learning? (Assessment)
Ask open ended questions. Ask them to describe their picture to you. Explain how they made it and what shapes and colors they used.
How can you extend this activity? (Modifications)
What else can you find in the ocean? Can you create those creatures as well for your picture?
Helpful Hints: (Pitfalls & Solutions)
Make sure you give it enough time to dry.


 RSS Feed
