WELCOME THE LAUREL SCHOOL TODDLER, PRESCHOOL & PRE-KINDERGARTEN VIRTUAL CLASSROOMS
  • Welcome
  • Toddler
    • Ms. Naomi & Ms. Haley
    • Ms. Margo & Ms. Tonia
  • Preschool
    • Ms. Rachel
    • Ms. Julia
    • Ms. Taisha
    • Ms. Amanda
    • You Tube Stories & Songs
  • Pre-Kindergarten
    • Ms. Lynn
    • Ms. Nancy
  • Ms. Sunny's Corner
  • Student & Family Shares!
  • Contact

Ms. Taisha's 
Preschool resources

Let's have fun together!

Button Text

Magical color transfer!

4/30/2020

0 Comments

 
What is our theme? Magical color transfer!

What is the lesson (overall purpose)?  
to learn about being patient  


MA Guidelines/Standards:
SEL8: The child will engage socially, and build relationships with other children and with adults.
APL 2: The child will demonstrate eagerness and curiosity as a learner.
APL4: The child will demonstrate creativity in thinking and use of materials.


Learning Outcomes:
to learn about mixing colors 


Songs, Books & Videos (Motivational Techniques)
Book: Mix it Up By: Herve Tullet https://youtu.be/WLxFNtNZa4E 

Materials
  1. red and yellow food coloring
  2. three pieces of paper towels
  3. three cups
  4. water

Activity (Procedure):
  1. Begin by placing the cups next to each in a line. Fill the first and third cup with water, leaving the center cup empty. Add several drops of yellow food coloring to the first cup.
  2. Add red food coloring to the third cup, be sure to stir each one to make sure the colors are completely mixed in.
  3. Twist each piece of paper towel to form a “wick” for your water to climb. Place one end of the twisted paper towel into the yellow water and the other end into the empty cup.
  4. You're going to want to do the same with the red water.
  5. It may take about 15 mins. to see anything happening.

Activity Wrap Up: Ask your child, why and how do you think that happened? What colors did they make?

How do I know what my child is learning? (Assessment)
Is your child able to tell you what happened with the colored water and the paper towels?

How can you extend this activity? (Modifications)
You can try and add more colors to see what will happen

Helpful Hints: (Pitfalls & Solutions)
If you don’t have plastic clear cups, you can use glass cups( but please make sure to be very careful)


​
0 Comments

Making Playdough

4/29/2020

0 Comments

 
What is our theme? Let’s make playdough 

What is the lesson (overall purpose)?
To learn how to measure food while cooking   

MA Guidelines/Standards:
SEL8: The child will engage socially, and build relationships with other children and with adults.
APL 2: The child will demonstrate eagerness and curiosity as a learner.
APL4: The child will demonstrate creativity in thinking and use of materials.

Learning Outcomes:
To learn how to make playdough


Songs, Books & Videos (Motivational Techniques)
Book: Monsters Love Colors By: Mike Austin https://youtu.be/GIEaKcvXbJA 

Materials:
1.5 cups flour
1/2 cup salt
2 teaspoons cream of tartar
2 tablespoons oil
1 cup of boiling water
 Bowl

Activity (Procedure):
  1. Dump all the dry ingredients into the bowl and mix it all together.
  2. Then add in the boiling water and stir. 
  3. Knead a few times and it will become perfectly smooth.
  4. Divide the playdough into three pieces equally.
  5.  Add red food coloring to one piece of your playdough, blue to the second piece and yellow to the last piece.
  6. Knead the three pieces individually until the colors are completely mixed in.
  7. Lastly, you can take little pieces of each color and mix with another color. 


Activity Wrap Up:
Ask your child what do you think will happen if we mix all of the colors together? 

How can you extend this activity? (Modifications)
You can give your child a spoon, fork, a plastic cup etc. to play with their playdough.


​
0 Comments

mixing colors with skittles

4/28/2020

0 Comments

 
What is our theme? 
Mixing colors with skittles 

What is the lesson (overall purpose)? 
 To learn about mixing colors but also for them to learn about patterns.


MA Guidelines/Standards:
SEL8: The child will engage socially, and build relationships with other children and with adults.
APL 2: The child will demonstrate eagerness and curiosity as a learner.
APL4: The child will demonstrate creativity in thinking and use of materials.


Learning Outcomes:
To be able to do patterns


Songs, Books & Videos (Motivational Techniques)
Book: MIXED A colorful story By: Arree Chung https://youtu.be/SIbGioTNs4M 

Materials:
  1. A bag of skittles
  2. water 
  3. A white plate or container 

Activity (Procedure):
Have your child place the skittles onto a white container or plate and put them in a pattern.
Carefully pour water into the container or plate, Just enough water to cover the bottom. If the skittles move, just push them back into place quickly. Do not leave any gaps in between the skittles.
Watch what happens..

Activity Wrap Up: 
Ask your child, What are other ways you can make a pattern?


How do I know what my child is learning? (Assessment)
Is your child able to put them in a pattern?


How can you extend this activity? (Modifications) You can try it with other different candies but still using patterns  

Helpful Hints: (Pitfalls & Solutions)
If you don’t have a white plate or container, you can use a glass plate.


​
0 Comments

mixing colors!

4/27/2020

0 Comments

 
Our Lessons For the Week! Learning about primary colors and different ways we can mix colors!

What is our theme? 

Mixing colors 

What is the lesson (overall purpose)?  
To learn about mixing colors and what colors you get when mixing certain colors 

MA Guidelines/Standards:
SEL8: The child will engage socially, and build relationships with other children and with adults.
APL 2: The child will demonstrate eagerness and curiosity as a learner.
APL4: The child will demonstrate creativity in thinking and use of materials.

Learning Outcomes:
To learn about primary colors 

Songs, Books & Videos (Motivational Techniques)
Book: White Rabbit's Color Book https://youtu.be/_xfnRT68rEE 

Materials
  1. A piece of white paper 
  2. A paintbrush
  3. blue, red and yellow paint 

Activity (Procedure):
Put a couple of drops of the red paint on the paper and a couple of drops of the yellow paint, have them mix the colors to see what color they come up with. Do the same thing with yellow, blue and then the blue and red.

Activity Wrap Up: Before they mix the colors ask them, what color do you think you will get by mixing red and yellow? same thing with yellow, blue and blue and red.

How do I know what my child is learning? (Assessment)
Is your child able to remember the colors after mixing

How can you extend this activity? (Modifications)

They can paint a picture using those colors.

Helpful Hints: (Pitfalls & Solutions)
If you don’t have paint you can use food coloring.


​
0 Comments

Let’s make a paint brush

4/24/2020

0 Comments

 
What is our theme:  Let’s make a paint brush!

What is the lesson (overall purpose)?  
There are so many things you can make and do with natural things 

MA Guidelines/Standards:
Visual Arts 
3. Observation, Abstraction, Invention, and Expression. Students will demonstrate their powers of observation, abstraction, invention, and expression in a variety of media, materials, and techniques.
6.  Critical Response. Students will describe and analyze their own work and the work of others using appropriate visual arts vocabulary. When appropriate, students will connect their analysis to interpretation and evaluation.

Learning Outcomes:
learning how to use your creativity to make something out of natural materials to make something you might need that you don’t have at the moment.

Materials
a stick from outside 
a bunch of pine needles 
tape 
paper 
paint 

Activity (Procedure):
  1. Place the pine needles on one end of the stick 
  2. Tape the pine needles to the stick 
  3. Use your new paint brush to paint on the paper 

Activity Wrap Up: 
Can we use other trees or bushes to make paintbrushes? 

How do I know what my child is learning? (Assessment)
Is your child able to tell you other trees and bushes you can use to make paint brushes?

How can you extend this activity? (Modifications)
you can make different sizes of paint brushes

Helpful Hints: (Pitfalls & Solutions)
If you don’t have tape, you can use yarn to tie the pine needles on the stick.


​
0 Comments

Building a home for an outdoor friend

4/23/2020

0 Comments

 
What is our theme:  Building a home for an outdoor friend 

MA Guidelines/Standards:
PreK-ESS2-1 (MA). Raise questions and engage in discussions about how different types of local environments (including water) provide homes for different kinds of living things.
K-LS1-1. Observe and communicate that animals (including humans) and plants need food, water, and air to survive. Animals get food from plants or other animals. Plants make their own food and need light to live and grow.


Materials
sticks
pine needles 
acorns 
pine cones 
leaves 
Bucket

Activity (Procedure):
Build a home for an animal that lives outside 
1. Collect any natural things use you find 
2. Build the home any way you would like
   
Activity Wrap up:
Ask your child, what kind of animals live outside? Where outside do they live? What kind of food do they eat? What do they drink?  Is it safe, if we see these animals outside, do we go up to them to pet or play with?etc.

How do I know what my child is learning? 
(Assessment)
Is your child able to tell you, what kind of animals live outside? Are they able to build a house for an animal outside?


How can you extend this activity? (Modifications)
They can build multiple homes.

Helpful Hints: (Pitfalls & Solutions)
Sometimes it’s easier to build under a bench, picnic table or even a chair. Just in case if it rains, it will not destroy what you made.


​
0 Comments

Nature Collection art

4/22/2020

0 Comments

 
What is our theme:  What can you make?

What is the lesson (overall purpose)?  
Getting creative and making a picture or something with the things you collected from outside 

MA Guidelines/Standards:
Visual Arts 3. Observation, Abstraction, Invention, and Expression. Students will demonstrate their powers of observation, abstraction, invention, and expression in a variety of media, materials, and techniques.


Learning Outcomes:
That there are so many things you can make with natural things 

Songs, Books & Videos (Motivational Techniques)
Book: Exploring the Great Outdoors By: Mercer Mayer https://youtu.be/Q1gBRPVZZOU 

Materials
  1. Paper 
  2. Glue 

Activity (Procedure):
Have them glue of pieces of the things they collected and make a picture 


Activity Wrap Up:
Ask the child, What did you make? Why did you make that? 

How can you extend this activity? (Modifications)
You can give them markers and crayons so they can make their pictures colorful if they would like to

Helpful Hints: (Pitfalls & Solutions)
If the things outside are wet, you can have them draw what they were going to make with the natural things from outside.


​
0 Comments

Nature! what can you find?

4/21/2020

0 Comments

 
What is our theme: What can you find?

What is the lesson (overall purpose)?  
To learn the different things they collected, and what they belong too

MA Guidelines/Standards:
Visual Arts 3. Observation, Abstraction, Invention, and Expression. Students will demonstrate their powers of observation, abstraction, invention, and expression in a variety of media, materials, and techniques.

Learning Outcomes:
Learning about the beautiful things that nature has to offer 


Songs, Books & Videos (Motivational Techniques)
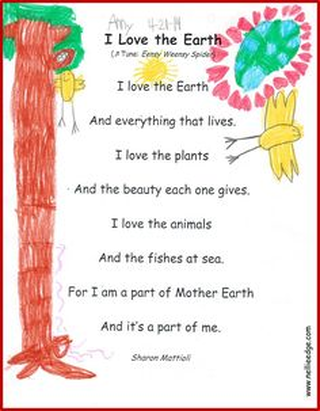
Poem: (Posted Below)

Materials
Bucket

Activity (Procedure):
Go for a walk around your neighborhood or in your backyard. Collect, pine cones, acorns, pine needles, leaves, sticks, pebbles, moss, some grass even a couple of little flowers 

Activity Wrap Up:
What are some things you can do or make with the things you found? Write down their ideas.

How do I know what my child is learning? (Assessment)
If your child can tell you some of the names of the things they collected.

How can you extend this activity? (Modifications)
You can ask them, Where do the things you collected belong to? What other things do you see on our walk?

Helpful Hints: (Pitfalls & Solutions)
If you don’t have a bucket, you can use a reusable bag.


​
Picture
0 Comments

bird feeders!

4/20/2020

0 Comments

 
Our Lessons For the Week! Learning about the different things you can do with natural materials

What is our theme? Bird feeders 

What is the lesson (overall purpose)?
  To learn what different things we can do with pine cones 


MA Guidelines/Standards: 
SEL7: The child will demonstrate the ability to communicate with others in a variety of ways.

Learning Outcomes:
Learning about where pinecones come from and what are some things we can do with them.

Songs, Books & Videos (Motivational Techniques)
Book: Penguin and Pinecone By: Salina Yoon https://youtu.be/Vb8AHM6HFW8 

Materials
  1. pine cone (however many pine cones you would like)
  2. sunbutter 
  3. bird seeds 
  4. bowl 
  5. plastic knife 
  6. yarn or string 

Activity (Procedure):

  1. Pour the birds seeds in the bowl 
  2. spread the sunbutter all over the pine cone(s)
  3. roll the pine cone(s) in the bird seeds, make sure it is covered with the bird seeds 
  4. tie some yarn on one end of the pine cone to be able to hang on a tree

Activity Wrap Up:
Where do pine cones come from? Can we plant them? If we do plant them, What will grow from the pine cones? How long do they think it will take to grow? What else can we make with pine cones? etc.

How do I know what my child is learning? (Assessment)
Is your child able to tell you where do pine cones come from?

How can you extend this activity? (Modifications)
If your child doesn’t feel like making bird feeders, they can paint them to look likes little bushes or anything they want to make them look like 

Helpful Hints: (Pitfalls & Solutions)
If you don’t have bird seeds, you can crush some crackers and use that.


​
0 Comments

Healthy? or not healthy?

4/17/2020

0 Comments

 
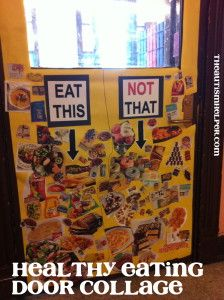
What is our theme? Healthy not healthy

What is the lesson (overall purpose)?  
To be able to seperate good foods from "not so healthy" foods 

MA Guidelines/Standards:
APL4: The child will demonstrate creativity in thinking and use of materials.
APL5: The child will cooperate with others in play and learning.

Learning Outcomes: Learning that not all foods are healthy 

Songs, Books & Videos (Motivational Techniques)
Book: Why Should I eat well By: Claire Llewelyn https://youtu.be/2gPi2uXFdEk 

Song: 


Materials
To make a collage of healthy and not healthy foods you'll need: 
  1. Paper 
  2. Scissors 
  3. Glue stick
  4. Markers
  5. Sales flyers 

Activity (Procedure):
  1. Cut out healthy and not healthy foods from the sales flyers  
  2. Label on one side of your paper healthy foods 
  3. On the other side label not healthy 
  4. Then glue on the healthy foods on the healthy side 
  5. Lastly, glue the not healthy foods on the not healthy side  

Activity Wrap Up: Ask your child, why do you think this food is not healthy or is healthy for you?

How do I know what my child is learning? (Assessment)
Is your child understanding the difference between healthy and not healthy? 

How can you extend this activity? (Modifications)

You check in your cabinets or fridge and see what things in there are healthy and not healthy 

Helpful Hints: (Pitfalls & Solutions)
If you don’t have sales flyers, you can have them draw some pictures 

Picture
0 Comments
<<Previous

    Author

    Ms. Taisha - Preschool Teacher

    Archives

    June 2020
    May 2020
    April 2020
    March 2020

    Categories

    All

    RSS Feed

Proudly powered by Weebly