What is our theme? Beach
What is the lesson
Making a beach inspired snack!
MA Guidelines/Standards:
Learning Outcomes:
Continue learning about things found on the beach such asf fish, shells, water, sand, etc.
Songs,Books,Video(Motivational Techniques)
Song: https://www.youtube.com/watch?v=b-joNU9em1w
Song: Interactive song we use in school: “The Goldfish” https://www.youtube.com/watch?v=Cg-wnQKRHTs
Materials-
Activity (Procedure):
Activity Wrap Up:
Ask your child about what they see in their snack that they also see at the beach.
How do I know what my child is learning?
(Assessment)
Do they recognize the water? The fish?
How can you extend this activity? (Modifications)
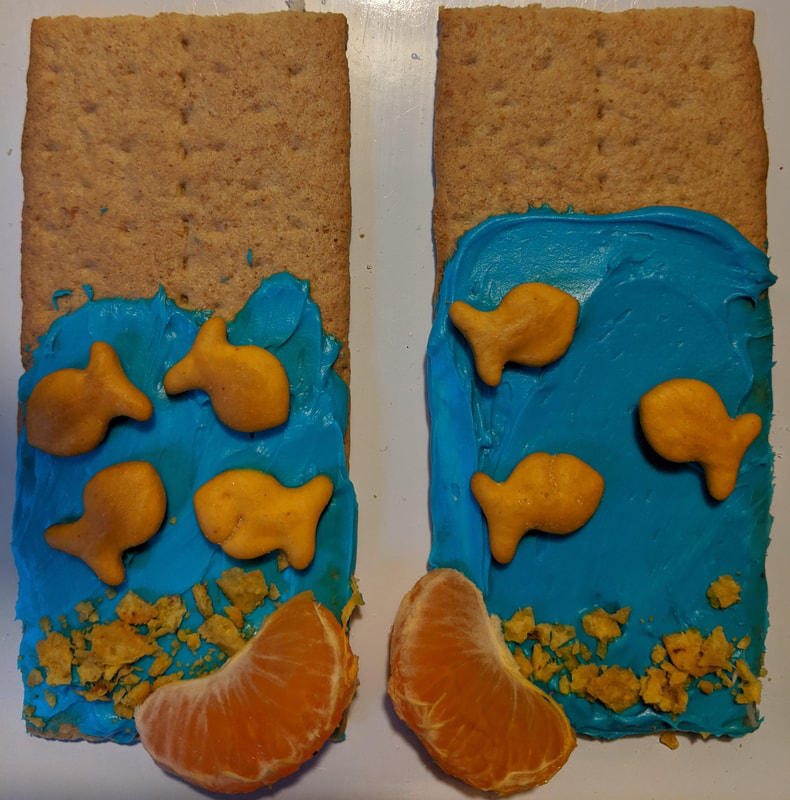
If you want to include shells to your snack, we found that a slice from a clementine resembled a shell.
Helpful Hints: (Pitfalls & Solutions)
If your child doesn’t want to eat the snack, it’s okay! Offer it to them again later or talk about other healthy snack choices
What is the lesson
Making a beach inspired snack!
MA Guidelines/Standards:
- PW34. The young toddler controls small muscles in hand.
- PW37. The young toddler participates in physical care routines.
- LC39. The older toddler participates in conversations.
Learning Outcomes:
Continue learning about things found on the beach such asf fish, shells, water, sand, etc.
Songs,Books,Video(Motivational Techniques)
Song: https://www.youtube.com/watch?v=b-joNU9em1w
Song: Interactive song we use in school: “The Goldfish” https://www.youtube.com/watch?v=Cg-wnQKRHTs
Materials-
- Graham Crackers
- Frosting (or yogurt for a healthier choice)
- Blue food coloring
- Gold fish
- Ziplock or reusable bag
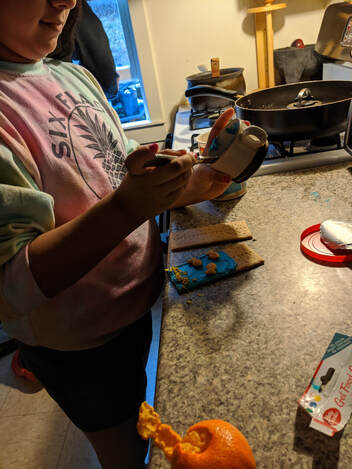
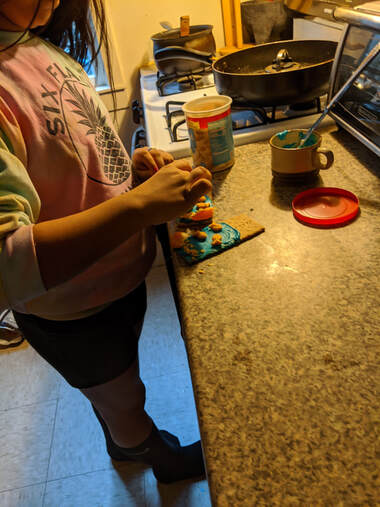
Activity (Procedure):
- Start by dying a small amount of frosting or yogurt blue
- Coat ¾ of the graham cracker with frosting/yogurt. This is your water.
- In a ziplock or reusable bag, crush half of a gram cracker.
- Sprinkle the crushed graham cracker on the bottom of the whole graham cracker. This is your sand.
- Add some goldfish to the blue parts of the graham cracker. These are the fish in the ocean
- Eat and enjoy!
Activity Wrap Up:
Ask your child about what they see in their snack that they also see at the beach.
How do I know what my child is learning?
(Assessment)
Do they recognize the water? The fish?
How can you extend this activity? (Modifications)
If you want to include shells to your snack, we found that a slice from a clementine resembled a shell.
Helpful Hints: (Pitfalls & Solutions)
If your child doesn’t want to eat the snack, it’s okay! Offer it to them again later or talk about other healthy snack choices

 RSS Feed
